Home » Angular Development » 4 Methods to Share Data between Components in Angular
4 Methods to Share Data between Components in Angular

In this tutorial, we’ll learn about the different ways to share data between components in Angular 6+.
It is a real challenge for the angular developer to share the data between components in angular, we have different ways to share data between the components. We have to define the relationship between the components.
So let us get started a demonstration of data sharing concepts in angular with real-time scenarios. Please follow the below steps.
Prerequisites:
- Prior knowledge of TypeScript
- Prior knowledge of JavaScript
- Visual Studio Code
- Development machine with Node 8.9+ & NPM 5.5.1+ installed
Step by step tutorial on sharing data between components in Angular
Step 1: Installing Angular CLI
First step, where we’ll have to install latest version of Angular CLI
npm install -g @angular/cliStep 2: Creating your Angular Project
In this second step, we will use Angular CLI to start our Angular Project
Go to CMD or Terminal and use this command:
ng new angular-demoThis CLI will ask you “whether you would like to add Angular routing” Say Yes.
It will ask “which stylesheet format you would like to use”. Choose CSS.
Now your project is ready Angular CLI will generate required files and folders along with NPM packages and routing too.
Now open your project in Visual studio code and go to your root folder and run the local development server using below command:
npm start- Now run localhost:4200/ in your browser
- You will see angular application index page.
Step 3: Create a new Component
- Let’s create a new component in app folder:
- A command for creating a new component:
ng g c childAs we can see here, child component has been created in the app folder. And automatically declared in app.module.ts file.
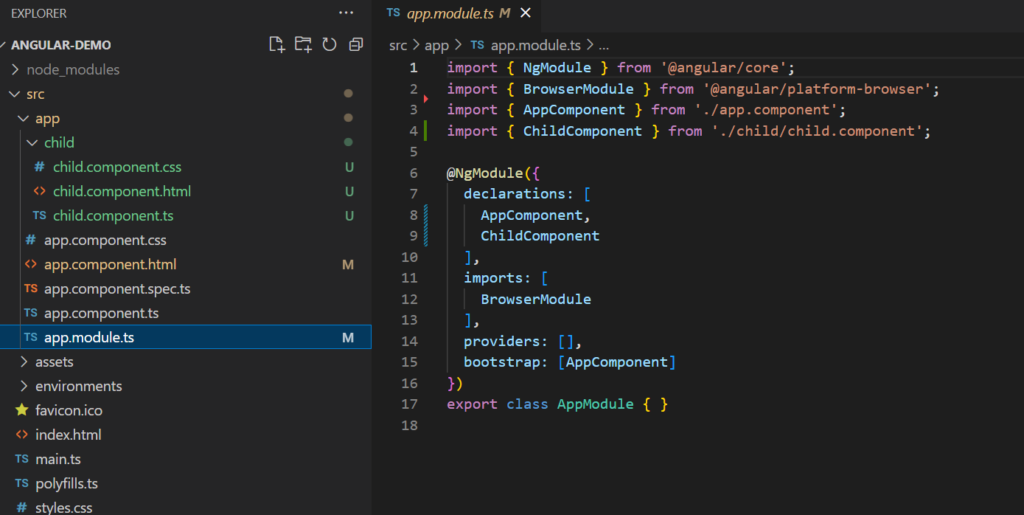
Step 4: Methods to Share Data between Angular Components
- Parent to Child: via Input
- Child to Parent: via Output() and EventEmitter
- Child to Parent: via ViewChild
- Unrelated Components: via a Service
Now let’s understand all four ways one by one:
Method 1: Parent to Child via @Input decorator
Let’s assume, you have one component, where you have some data and you want to supply that data to the child component, How it possible ??? Answer is @input. So what is @Input?? @Input is a decorator which allows you to accept the input from the parent component. Input can be imported from @angular/core.
Let’s see below: In our demonstration we have app component and this app component we will consider as parent component.
We have another component, it is child. we’ll put this child component inside parent component.

Now save the application and we will see in the browser something like below:

Next, declaring two variables in app.component.ts file. And try to access from html end in app.component.html file and child.component.html file.
app.component.ts
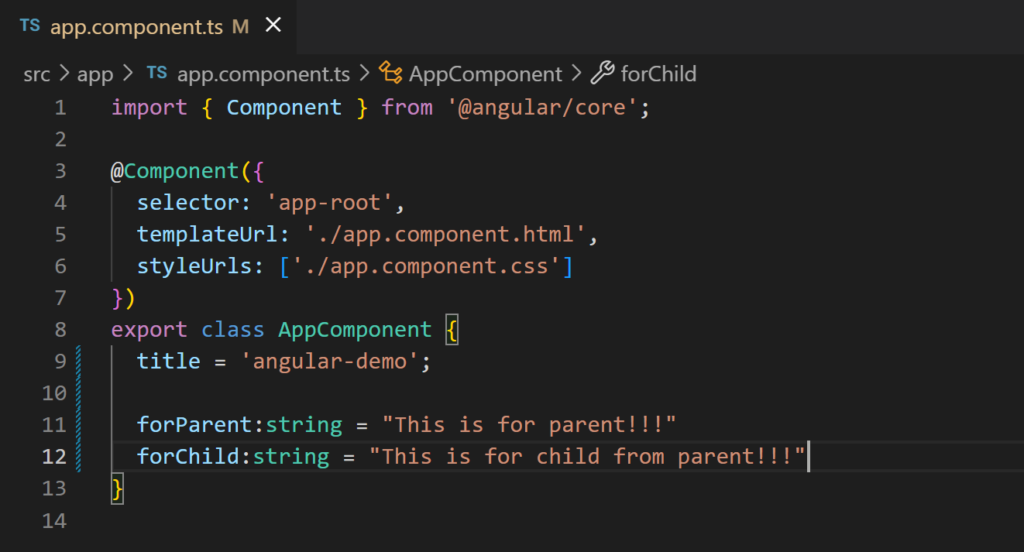
app.component.html

Let’s save and check what can we see in browser.

Now, Let’s try to access variable from parent component in the child component using @Input decorator.
Update your code file as below:
This is how the parent component is supplying the input to the child component.
(app.component.html)

child.component.ts
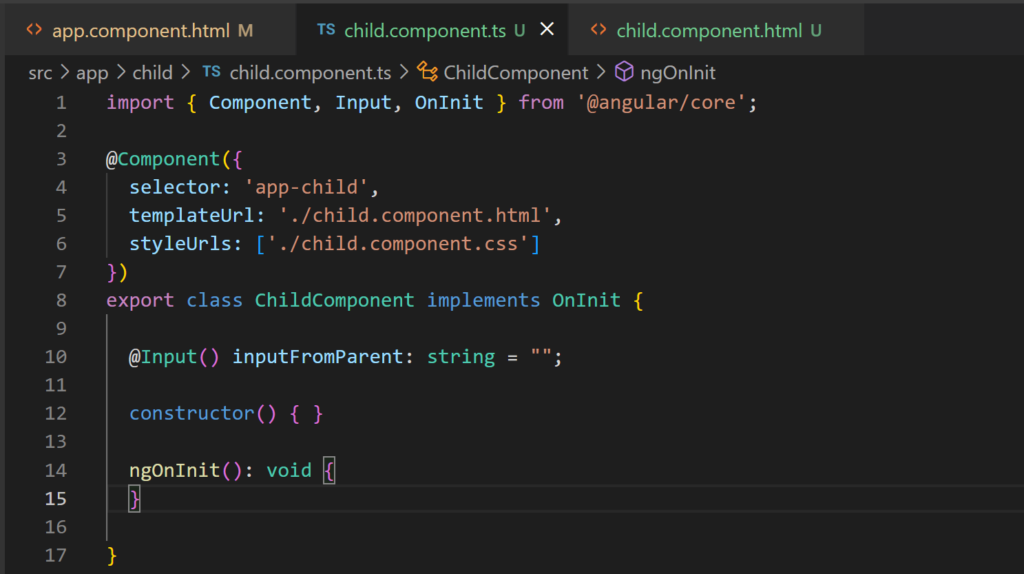
child.component.html

So, we can see output like below:

So, as above we can access data(variable/class/array/list) from parent component to child component, using @Input decorator.
Method 2: Child to Parent via @Output decorator and EventEmitter
If you want to pass data from the child component to the parent component use @Output() and EventEmitter.
First, let us discuss what is @Output and EventEmitter, @Output is a component decorator which becomes the output for the parent component and EventEmitter is something that has the capability to propagate the event from the child component to the parent component.
To pass data from the child to the parent, you have to emit it from the child. The parent will be listening for the event will grab the data. Please follow the below codes.
We have app.component.ts as a parent component and child.component.ts as child component. Let’s try to pass data from app component to child component.
child.component.ts
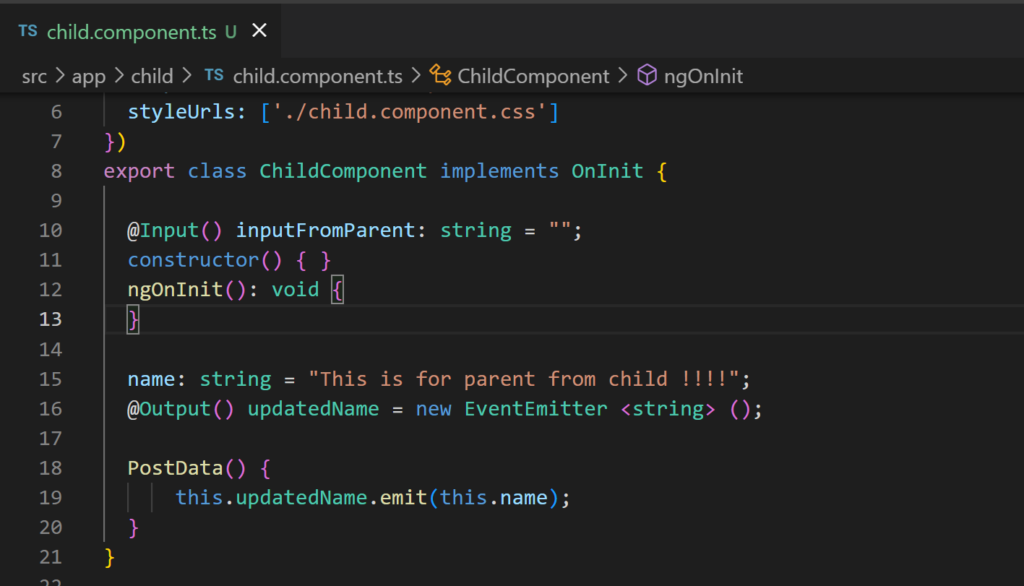
child.component.html

Update your child component files as above.
In our child component, we create a updated Name emitter that sends the name anytime the user clicks the Post Data button. To receive the name in the parent, we have to create a function to grab that data and put it into a variable.
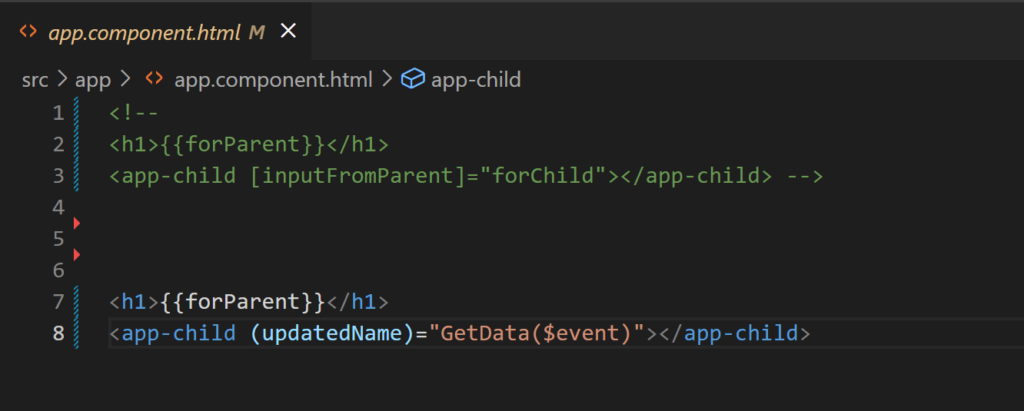
app.component.html
app.component.ts
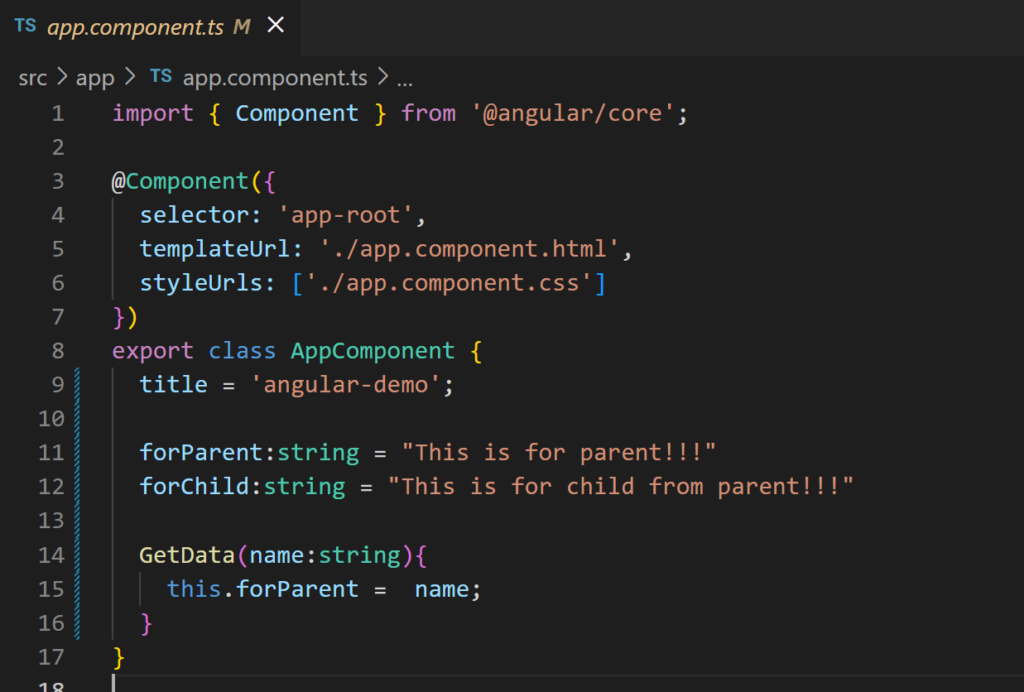
In our parent component, (updated Name Emitter) listens for the event with the message attached to it and when the message is emitted, it captures the data in the $event and sets this for Parent to the value of $event.
Output:
When we’ll click on postdata button, we can see like below:

So, that’s all about @Output and event emitter.
Method 3: Child to Parent via @ViewChild decorator
Here as we know we have @output and event emitter to share the data from child to parent component, so why @Viewchild is needed ? hold on it is needed because it gives extra control to parent component to access the child events.
Here we are just understanding by passing the data from child to parent by using @Viewchild decorator, Let’s see.
Update your code according to below:
app.component.ts

app.component.html
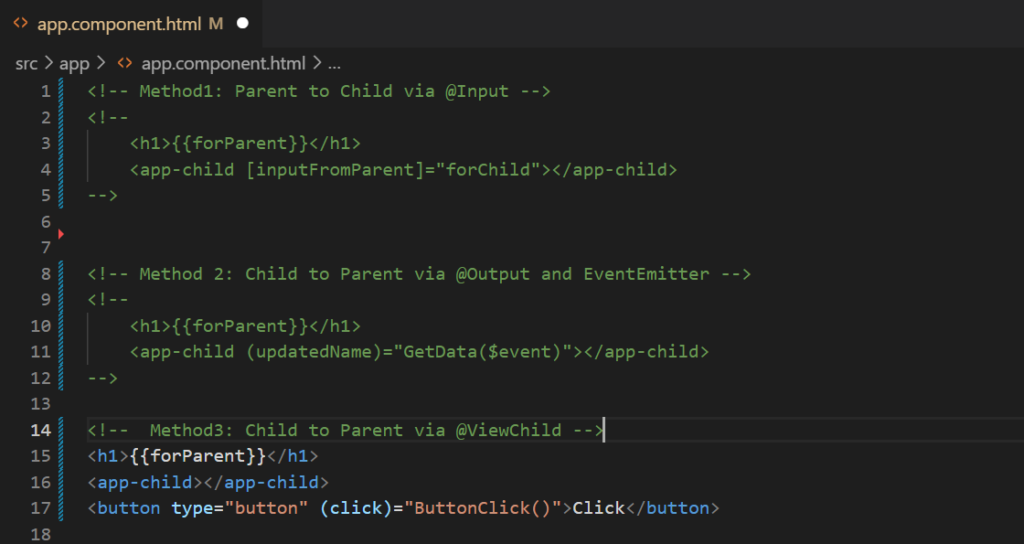
As we can see above in the app.component.ts file, here we have imported the @viewchild to provide the particular component as view child. Then next is supply the child component as view child.
Output:
When we’ll click on button, it’s seems like below result, here this data getting from name variable of child component.

So, in this way we can also pass the data from child to parent component.
Method 4: Unrelated Components via a Service
So, Let’s see how we can pass data from one component to another component without any relation.
For that, we need to add some files.
First need to create a another component for simplicity to understand.
Create a new component by command:
ng g c testAfter that, Add service file in app folder
To create a service file in app folder use below command:
ng g s appNext, create a routing module file.
Command:
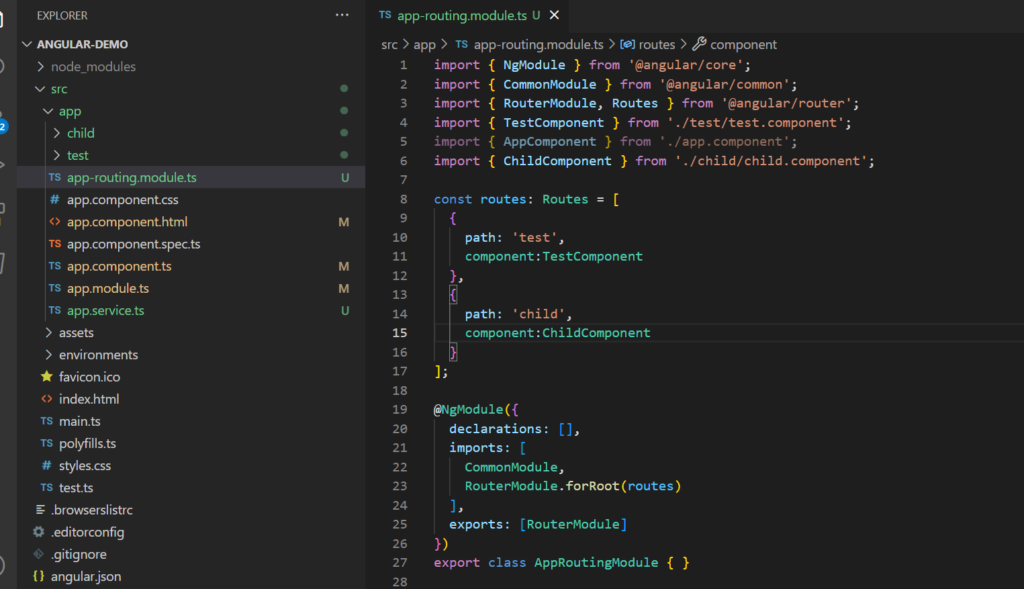
ng generate module app-routing --flat --module=appall above steps completed our folder structure look like after adding route for test component will be like below:
app-routing.module.ts
app.component.html

As we can see above, we have added route for test component.
Let’s check it.
Browser will show like below:

Now, Let’s try to set and get data by using service.
Update the code of app.service.ts file like below:

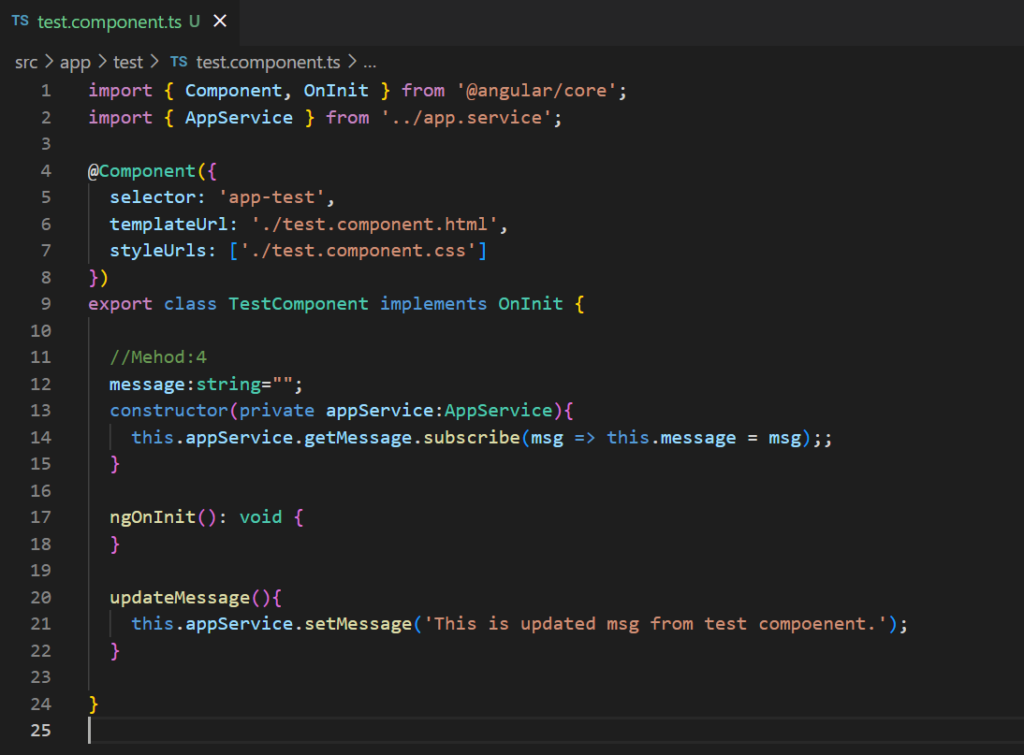
As we can see in above service file, there is one method for set Message and another getMessage for get message in any where using behaviorSubject.
Now let’s import this service in app component and try to get Message.
You have to update your test component files like below:
test.component.ts
test.component.html

And our output will be:

Now, Let’s try to update this message to the service and will get updated message in child component.
When you click on update button, it will update current message and we can use this stored message anywhere by calling service in the component.
By clicking go to child button, we will redirect to child component and there we can see updated message which are getting from service.
By clicking update button, getting result like below:

And then after, click on go to child button.

So, in this way we can pass data from one component to another component by using service.
Note that, We are able to pass the value using services, but once the page refreshes the value is not maintained in the service. It is sufficient if pages or component redirect using routing module. That’s why we are using here routing module.
Tutorial Sample Source Code
Looking for a Sample Source Code? Here you go: GitHub
So, I’ve explained all four way to share data between components, I hope this article was helpful.
Moreover, if you’re dealing with enterprise software or large-scale applications, you may wish to seek professional assistance. For an expert helping hand, Get in touch with us to hire dedicated Angular developers with having a minimum of 5+ years of experience working on enterprise software.
I am working as Jr. Full Stack Developer (.NET/Angular) at Samarpan Infotech. I've good analytical thinking and collaboration skills, and I love working with a team.


