How to Create Custom Secure Token Authentication in DotNET


In this tutorial article, we’ll learn how we can create an Authentication token in Dot net core. This token contains the detail (e.g. IP Address, expire Token date, etc ). We will learn how any detail is encrypted and decrypted within the token. We can use this token for any authentication.
Prerequisites:
- Prior knowledge of C#
- Prior knowledge of .NET Core
- Visual studio 2019
How to Create Authentication Token: Step by Step Tutorial
Step 1: Create a New Web API Project
- Start Visual studio
- Choose Asp.net Web Application (C#)
- After that, you will have to configure your project
Here, Application Name: AuthDemo
Step 2: To create Token
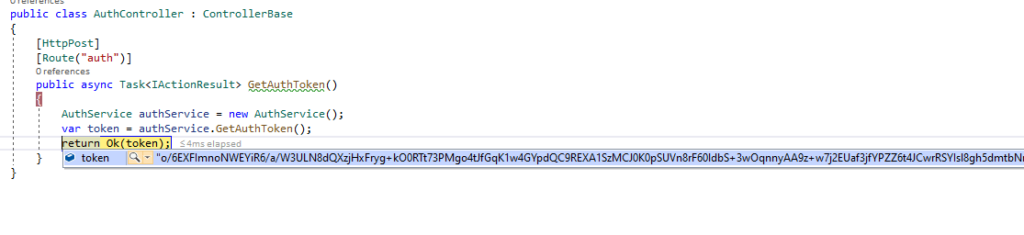
- Create a new Controller. Here, Create (AuthController.cs) Controller to defines the method.

And, Write a method to create a token
namespace AuthDemo.Controllers
{
    public class AuthController : ControllerBase
    {
        [HttpPost]
        [Route("auth")]
        public async Task<IActionResult> GetAuthToken()
        {
            AuthService authService = new AuthService();
            var token = authService.GetAuthToken();
            return Ok(token);
        }
    }
}- Create a Service to generate the token with Detail. (AuthService.cs)
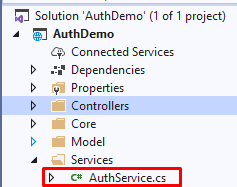
Here Token contains the Detail of authentication
public string GetAuthToken()
{
var sys_ip = "123.123.12.12"; // get requested system Ip
AuthTokenModel tokenModel = new AuthTokenModel
{
UserId = 1,
Expirydate = DateTime.Today.AddMinutes(30),
EmailId = "test@test.com",
SysIp = sys_ip
};
var token = JsonConvert.SerializeObject(tokenModel,Formatting.Indented);
token = EncryptText(token, AuthDemo.ConstantVariables.TokenKey);
//if Require Save into DB
//Code for Save into DB
return token;
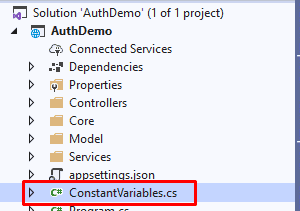
}Set Secret key in Constant. (ConstantVariables.cs)
- Use this key to encrypt the token

Here the methods to encrypt the token (in AuthService.cs)
public static string EncryptText(string input, string key)
{
string secretKey = key;
    // Get the bytes of the string
    byte[] bytesToBeEncrypted = Encoding.UTF8.GetBytes(input);
    byte[] passwordBytes = Encoding.UTF8.GetBytes(secretKey);
    // Hash the password with SHA256
    passwordBytes = SHA256.Create().ComputeHash(passwordBytes);
    byte[] bytesEncrypted = AES_Encrypt(bytesToBeEncrypted,passwordBytes);
string result = Convert.ToBase64String(bytesEncrypted);

return result;
}

public static byte[] AES_Encrypt(byte[] bytesToBeEncrypted, byte[] passwordBytes)
{
   byte[] encryptedBytes = null;
   byte[] saltBytes = new byte[] { 1, 2, 3, 4, 5, 6, 7, 8 };
   using (MemoryStream ms = new MemoryStream())
   {
   	using (RijndaelManaged AES = new RijndaelManaged())
         {
             AES.KeySize = 256;
             AES.BlockSize = 128;
             dynamic key = new Rfc2898DeriveBytes(passwordBytes, saltBytes, 1000);
             AES.Key = key.GetBytes(AES.KeySize / 8);
             AES.IV = key.GetBytes(AES.BlockSize / 8);
             AES.Mode = CipherMode.CBC;
             using (var cs = new CryptoStream(ms, AES.CreateEncryptor(), CryptoStreamMode.Write))
             {
                  cs.Write(bytesToBeEncrypted, 0,bytesToBeEncrypted.Length);
                  cs.Close();
             }
         encryptedBytes = ms.ToArray();
          }
    }
    return encryptedBytes;
 }
Response:
Now, Let’s run the project and get the token. (create request from the postman)

Let’s Debug and check the created token.

Now, Let’s Move to next step.
Step 3: How to Use this Token
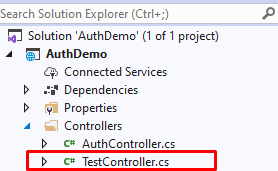
- Now, Create a controller for a method.
- Create Controller(TestController.cs)
public class TestController : ControllerBase

{
        [HttpGet]
        [Route("get-list")]
        [AuthAttribute()]
        public async Task<IActionResult> GetDataList()
        {
            var _res = new { status = 200, Message = "Sucesss", Data = "Succesfully Authorize.!" };
            return Ok(_res);
        }
}
Create an AuthAttribute to validate the token
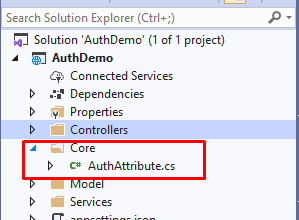
The [AuthAttribute] attribute enables you to restrict access to resources based on Permission. It is a declarative attribute that can be applied to a controller or an action method.
To create the attribute method please refer to previous blog: How to Check Permission Using Attribute in Web API
In this method, get the token from header and validate the token. If the token is invalid then the user can’t get the response.
public void OnAuthorization(AuthorizationFilterContext context)
{
     string token = context.HttpContext.Request?.Headers["token"].ToString();
     AuthService authService = new AuthService();
     var authModel = authService.GetTokenModelByvalue(token); // Decrypt the token
     if (authModel.Expirydate < DateTime.Now)
     {
     	return;
     }
}
Decrypt and validate the Token (in AuthService.cs)
public AuthTokenModel GetTokenModelByvalue(string tokenVal)
{
     string tokenstring = DecryptText(tokenVal,AuthDemo.ConstantVariables.TokenKey);
     return JsonConvert.DeserializeObject<AuthTokenModel>(tokenstring);

}
public static string DecryptText(string input, string key)
  {
            string secretKey = key;
            // Get the bytes of the string
            byte[] bytesToBeDecrypted = Convert.FromBase64String(input);
            byte[] passwordBytes = Encoding.UTF8.GetBytes(secretKey);
            passwordBytes = SHA256.Create().ComputeHash(passwordBytes);
            byte[] bytesDecrypted = AES_Decrypt(bytesToBeDecrypted, passwordBytes);
            string result = Encoding.UTF8.GetString(bytesDecrypted);
            return result;
}
public static byte[] AES_Decrypt(byte[] bytesToBeDecrypted, byte[] passwordBytes)
{
byte[] decryptedBytes = null;
    // Set your salt here, change it to meet your flavor:
    // The salt bytes must be at least 8 bytes.
    byte[] saltBytes = new byte[] { 1, 2, 3, 4, 5, 6, 7, 8 };
    using (MemoryStream ms = new MemoryStream())
    {
       using (RijndaelManaged AES = new RijndaelManaged())
       {
       	AES.KeySize = 256;
        AES.BlockSize = 128;
        dynamic key = new Rfc2898DeriveBytes(passwordBytes, saltBytes, 1000);
        AES.Key = key.GetBytes(AES.KeySize / 8);
        AES.IV = key.GetBytes(AES.BlockSize / 8);
        AES.Mode = CipherMode.CBC;
        using (var cs = new CryptoStream(ms, AES.CreateDecryptor(), CryptoStreamMode.Write))
	{
         	cs.Write(bytesToBeDecrypted, 0, bytesToBeDecrypted.Length);
             	cs.Close();
         }
        decryptedBytes = ms.ToArray();
       }
     }
return decryptedBytes;
}
Output
1. Create the Token:


2. Use of this token:
Set token in header to get the output


Get token from header and decrypt the token detail and validate


Example
Real time example to use the Authentication token
We can create the token, to validate the login user.
For e.g. (With below steps)
- Step 1: Validate the UserName and Password
- Step 2: Get UserDetail like (ID, EmailId, etc.)
- Now Create the Model with Detail of
- UserDetail
- IP [User system IP]
- Expiration Date [Token Expiration date]
- Step 3: Convert the Model into Json
- Encrypt the Json string (Token)
- Return token (as a response of Login)
- Step 4: Set the token in header to access
- Step 5: Create a [attribute] to validate the access the token
- Step 6: [attribute] method is get token from header
- decrypt the token
- check the IP Address with the requested method call system IP
- if it is not authenticate then the user cannot get reference.
That’s it. Over To You!
Looking for a Sample Source Code? Here you go: GITHUB.
That’s it for now. Today you have learned how to create custom secure token authentication in Dot Net. Happy Coding…
At last, If you’re dealing with large-scale applications or enterprise software, it is beneficial to take experts’ help. If you’re looking for an expert helping hand, contact Samarpan Infotech and hire Dot NET developers with having minimum of 5+ years of experience working on enterprise software.
Related Read >> Machine Learning with C# Example
I'm working as .NET, Angular Developer at Samarpan Infotech which has a unique combination of quality, value, trust, reliability. I'm always improving my technical skill with the market demand and new technologies.