How to Check Permission Using Attribute in C# / Web API


In this tutorial article, we’ll learn how we can check permission using attribute in Web API / C#
Prerequisites:
- Prior knowledge of C#
- Prior knowledge of .NET Core
- Visual studio 2019
Check permission using attribute: Step by step tutorial
Step 1: Create a New Web API Project
- Startup Visual studio
- Choose Asp.net Web Application (C#)
- After that, you will have to configure your project
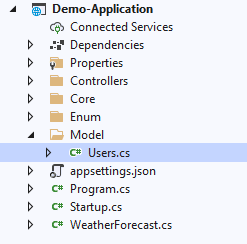
Here, Application Name: Demo-Application
Step 2: Add a New Controller
- Create a new Controller. Here, Create (TestController.cs) Controller to defines the method.

- And, Write code inside controller file like below.
namespace Demo_Application.Controllers
{
public class TestController : ControllerBase
{
[HttpGet]
[Route("get-list")]
public async Task<IActionResult> GetDataList()
{
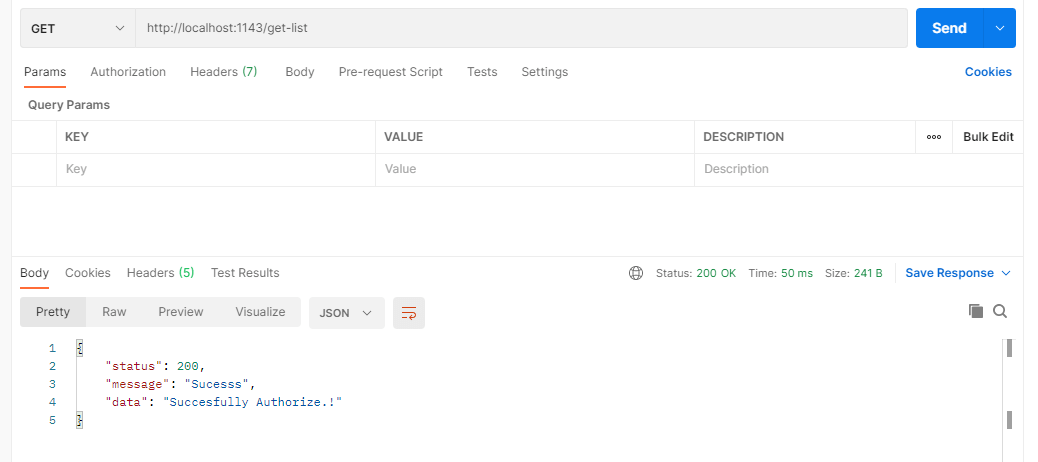
var _res = new { status = 200, Message = "Sucesss", Data = "Succesfully Authorize.!" };
return Ok(_res);
}
}
}- Here the method is without any permission which is get successfully response message.
Response:
Now, Let’s run the project and get the response from postman.

Step 3: Create Enum
- Now, Create a Enum (PermissionEnum.cs) file inside Enum Folder.

- And, Write Code inside PermissionEnum.cs file like below:
using System;
using System.Collections.Generic;
using System.Linq;
using System.Threading.Tasks;

namespace Demo_Application.Enum
{
    public class PermissionEnum
    {
        public enum Rights
        {
            ADD,
            EDIT,
            VIEW,
            DELETE
        }
    }
}
Step 4: Create Model and get User Details
- Model (User.cs) inside model folder.
- Here, Create Model for get list of user.
- Add Properties inside model (User.cs) file like below:
using System;
using System.Collections.Generic;
using System.Linq;
using System.Threading.Tasks;

namespace Demo_Application.Model
{
    public class Users
    {
        public int UserID { get; set; }
        public string Name { get; set; }
        public string Right { get; set; }

    }
}- Set the user List statically like below in TestAttribute.cs file
- We are taking user list to check the user permission with the current method permission.(We can get it from db)
List<Users> users = new List<Users>
                {
                    new Users { UserID = 1, Name = "Mahesh Chand", Right ="ADD"},
                    new Users { UserID = 2, Name = "Neel Beniwal" , Right ="EDIT"},
                    new Users { UserID = 10, Name = "Chris Love", Right ="VIEW"},
                    new Users { UserID = 22, Name = "Rakesh Chand" , Right ="ADD"},
                    new Users { UserID = 15, Name = "Test Test", Right ="DELETE" }
                };
In Next step, we use above data inside attribute file.
Step 5: Create Attribute
- Now, We create Attribute(TestAttribute.cs) inside Core folder.

- And Write code inside TestAttribute.cs file likes below:
using Demo_Application.Controllers;
using Demo_Application.Enum;
using Demo_Application.Model;
using Microsoft.AspNetCore.Http;
using Microsoft.AspNetCore.Mvc;
using Microsoft.AspNetCore.Mvc.Filters;
using System;
using System.Collections.Generic;
using System.Linq;
using System.Threading.Tasks;

namespace Demo_Application
{
    public class TestAttribute : TypeFilterAttribute
    {
        public TestAttribute(PermissionEnum.Rights[] item) : base(typeof(AuthorizeActionFilter))
        {
            Arguments = new object[] { item };
        }

        public class AuthorizeActionFilter : IAuthorizationFilter
        {
            private readonly PermissionEnum.Rights[] _item;

            public AuthorizeActionFilter(PermissionEnum.Rights[] item)
            {
                _item = item;
            }
            public void OnAuthorization(AuthorizationFilterContext context)
            {
                string userId = context.HttpContext.Request?.Headers["UserId"].ToString();

                var userList = UserList();  // Need to get this list from DB as per user
                var _right = _item[0].ToString();
                bool isUserPermission = userList.Where(w => w.UserID == Convert.ToInt32(userId) && w.Right == _right).Any();
                if (!isUserPermission)
                {
                    var _res = new { status = 401, Message = "Unauthorized Access", Data = "Unauthorized Access" };
                    context.Result = new JsonResult(_res);
                    return;
                }

            }

            public List<Users> UserList()
            {
                List<Users> users = new List<Users>
                {
                    new Users { UserID = 1, Name = "Mahesh Chand", Right ="ADD"},
                    new Users { UserID = 2, Name = "Neel Beniwal" , Right ="EDIT"},
                    new Users { UserID = 10, Name = "Chris Love", Right ="VIEW"},
                    new Users { UserID = 22, Name = "Rakesh Chand" , Right ="ADD"},
                    new Users { UserID = 15, Name = "Test Test", Right ="DELETE" }
                };
                return users;
            }
        }
    }
}- Above code, We set userList Statically, it can be comes from db.
Step 6: Use Attribute inside Controller File
The TestAttribute attribute enables you to restrict access to resources based on Permission. It is a declarative attribute that can be applied to a controller or an action method.
Now, Let’s set the permission in Controller File. Like below:
namespace Demo_Application.Controllers
{
    public class TestController : ControllerBase
    {
        [HttpGet]
        [Route("get-list")]
        [TestAttribute(new[] {PermissionEnum.Rights.DELETE})] //Check Permission for method
        public async Task<IActionResult> GetDataList()
        {
           var _res = new { status = 200, Message = "Sucesss", Data = "Succesfully Authorize.!" };
           return Ok(_res);
        }
    }
}
Fail Response :
- Now, Let’s Check “ADD” Permission of UserID = 10 with postman request.
- Here, we pass UserID = 10 in header to check permission of this user.
- If it has permission of “ADD”, then it will show success response. Otherwise shows “Unauthorized Access”.

- Here, We can see, It gives “Unauthorized Access” message.
Success Response :
- Now, Let’s check with “VIEW” Permission.
- If it has permission of “VIEW”, then it will show success response. Otherwise shows “Unauthorized Access”. Let’s check.

Here, we can access response inside controller file.
- So, This way we can check permission of user inside attribute file.
- We can give multiple permission like below:
public class TestController : ControllerBase
    {
        [HttpGet]
        [Route("get-list")]
        [TestAttribute(new[] {PermissionEnum.Rights.View, PermissionEnum.Rights.Add, PermissionEnum.Rights.Edit, PermissionEnum.Rights.Delete })]
        public async Task<IActionResult> GetDataList()
        {
For that, You have to modify code inside attribute file as per your needs.
Output:
Without Check Permission of Attribute:
Code Snippet of Request
namespace Demo_Application.Controllers
{
    public class TestController : ControllerBase
    {
        [HttpGet]
        [Route("get-list")]
        public async Task<IActionResult> GetDataList()
        {
           var _res = new { status = 200, Message = "Sucesss", Data = "Succesfully Authorize.!" };
           return Ok(_res);
        }
    }
}
Below is Screenshot of Response
With Check Permission of Attribute:
Fail Response:
Add inside controller file:
namespace Demo_Application.Controllers
{
    public class TestController : ControllerBase
    {
        [HttpGet]
        [Route("get-list")]
        [TestAttribute(new[] {PermissionEnum.Rights.VIEW})] //Check Permission for method
        public async Task<IActionResult> GetDataList()
        {
           var _res = new { status = 200, Message = "Sucesss", Data = "Succesfully Authorize.!" };
           return Ok(_res);
        }
    }
}
Check Permission of UserID = 15 for “VIEW” Permission
Pass UserID = 15 in Header

Success Response:
Check Permission of UserID = 15 for “DELETE” Permission
Add in controller file :
namespace Demo_Application.Controllers
{
    public class TestController : ControllerBase
    {
        [HttpGet]
        [Route("get-list")]
        [TestAttribute(new[] {PermissionEnum.Rights.DELETE})] //Check Permission for method
        public async Task<IActionResult> GetDataList()
        {
           var _res = new { status = 200, Message = "Sucesss", Data = "Succesfully Authorize.!" };
           return Ok(_res);
        }
    }
}
That’s it. Over To You!
Looking for a Sample Source Code? Here you go: GITHUB.
Related Read >>
How to Create Custom Secure Token Authentication in Dot NET Core
I am working as Jr. Full Stack Developer (.NET/Angular) at Samarpan Infotech. I've good analytical thinking and collaboration skills, and I love working with a team.